Learning Linux - Part 2
This is the second part of the Linux learning series. Key points are useful commands, work on files and how to move around in the file system.
Introduction
In this part, we will look at some useful Linux commands and how to work with files and folders. We will also cover how to navigate the file system. We will use an Ubuntu Linux VM in Azure created with Terraform. If you have not read the first part of this series, I recommend you do so. You can find it here: Learning Linux - Part 1.
Prerequisites
Before we begin, ensure you have the following prerequisites in place:
- An Azure Subscription and an account with sufficient permissions to create resources. Contributor role is sufficient for this lab. More granular roles are recommended in production.
- Terraform CLI installed on your local machine.
- Azure CLI installed on your local machine.
- Basic understanding of command line operations.
- Some prior knowledge in Terraform and Azure.
- Some Git knowledge is helpful but not mandatory.
- A Storage Account in Azure for Terraform state management.
- Git installed on your local machine.
Setting up the Environment

In this lab, we will start with an Ubuntu Linux VM in Azure inside a simplified Landing Zone architecture. This time, the VM is included in our Terraform code. We are starting the transition from a pet to cattle approach.
In this part of the series, we are going to be more concise explaining the steps to set up the environment. If you need more detailed instructions, please refer to Learning Linux - Part 1.
The resources we are going to create
Resource Group
|---Azure Linux Virtual Machine
    |---OS Disk (Ubuntu)
    |---Storage Account for Boot Diagnostics
|---Virtual Network
    |---Subnets
        |---Azure Bastion Subnet
        |---Default Subnet for our VM
            |---Network Security Group
    |---Public IP's
        |---Bastion Public IP
        |---VM Inet Access Public IP
    |---Virtual NIC for our VM
|---Azure Bastion
|---Azure Key Vault
    |---Public SSH Key
    |---Private SSH Key
|---Azure Log Analytics Workspace
|---Storage Account for logs
|---Network Watcher
    |---Virtual Network Network Watcher Flow Log
Step 1: Clone the repository
First, clone the repository that contains the Terraform configuration files for setting up the Azure infrastructure. My supporting repo is tagged with v1.0.1 for this part of the series.
git clone --branch v1.0.1 https://github.com/Jihillestad/tflab-linux-public.git- cd into the cloned directory:
cd ./tflab-linux-public git switch -c mainto make the git repo your own main branch.git remote remove originto remove the original repo as remote.
Step 2: Log in to Azure and prepare Terraform backend
Please see the first part of this series for detailed instructions on how to set up the backend in Azure. You can find it here: Learning Linux - Part 1.
Step 3: Build the lab
Now, we are ready to build the lab environment. Run the following commands in your terminal:
terraform initto initialize the Terraform configuration.terraform planto see the execution plan and verify the resources to be created.terraform apply -auto-approveto create the resources in Azure. This may take a few minutes.
Step 4: Verify your resources
It is important to verify that all resources have been created successfully. You start by
checking the output of the terraform apply command. Make sure there are no errors. Some useful
values are also outputted, like the VM's public IP address.
You can also log in to the Azure Portal and navigate to the Resource Group you specified in the Terraform variables file. Verify that all resources are present and correctly configured.
Step 5: Connect to the VM
Once the resources are created and verified, log in to the VM using Azure Bastion with the SSH option. The user name is "adminuser" unless you change the terraform variable. The private key is selectable from the Key Vault you created with Terraform.
Once connected, we can move on to the next section.
Useful Linux Commands
We are starting off our exploration in the home (./~) directory. This is where user-specific files and directories are stored. Each user has their own home directory.
What's in here?
Running the most basic command ls (list) will show you the contents of the current
directory. Adding the -l flag (long) will give you more details about each
item, such as permissions, owner, size, and modification date.

We just created the VM and nothing is installed yet, so the home directory looks pretty empty. Or is it? Let's check for hidden files using ls -la:
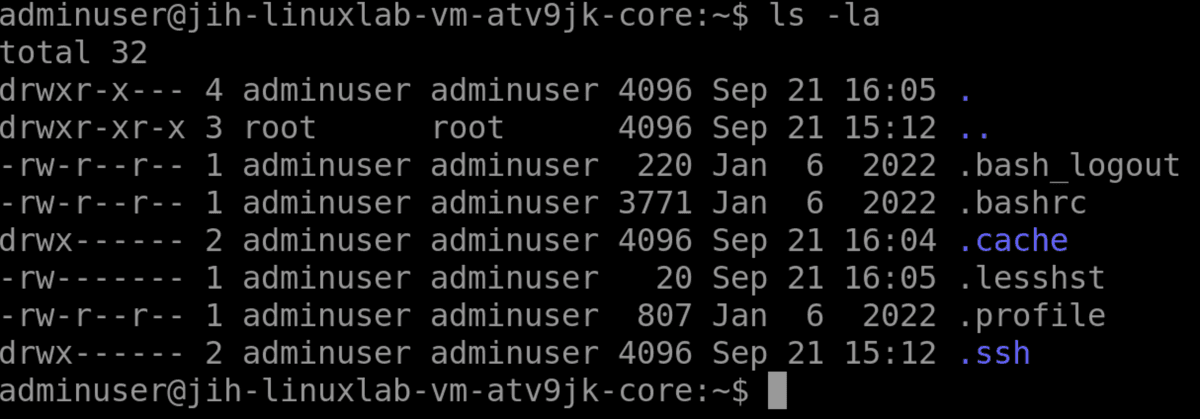
As you can see, there are several hidden files and directories (those starting
with a dot). These are usually configuration files and directories for various
applications and services. We call them dotfiles. For example, .bashrc is a
configuration file for the Bash shell.
What's in the files?
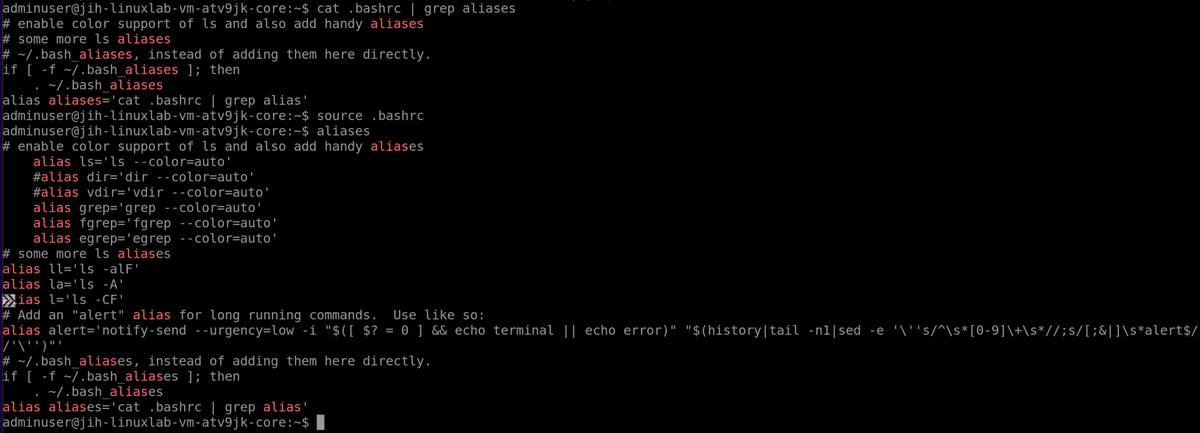
You can view the contents of a file using the cat command. For example, to view
the contents of the .bashrc file, you would run: cat .bashrc. This will
display the contents of the file in the terminal, in this case a lot of text
will be dumped in the terminal buffer.
However, we can narrow down the output to specific things we are looking for,
like aliases. We will use grep in the pipeline to filter the output.
Linux commands can be piped into each other with the "|" character. For
example, to find all aliases in the .bashrc file, you would run: cat .bashrc | grep alias.
Editing files directly in the command line
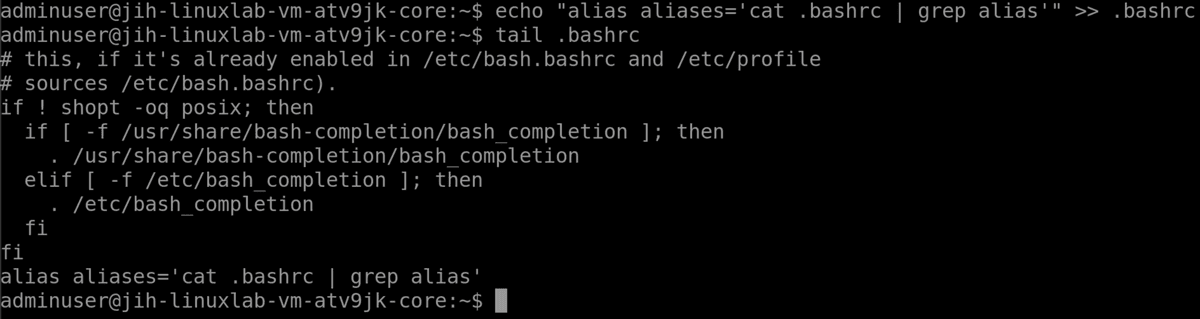
In this example, we are going to add a new alias to the .bashrc file. Aliases
are usually short versions of longer commands. We are appending a line to the
end of the file with a "quick and dirty" method using echo and the append
operator >>: echo alias aliases="cat .bashrc | grep alias" >> .bashrc.
To confirm that the alias was appended, we can use tail to view the last few
lines of the file: tail .bashrc.
Applying the changes to the Bash profile
To apply the changes made to the .bashrc file, we need to source it. This can be
done by running the command: source .bashrc. This will reload the .bashrc
file and apply the changes to the current shell session.
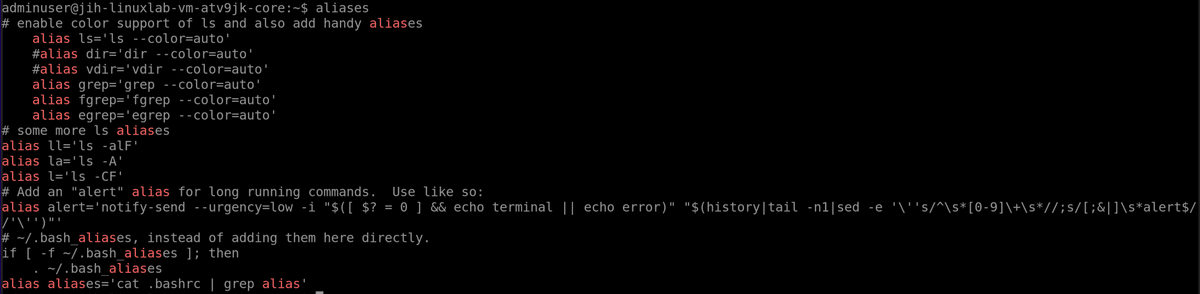
Testing the new alias
Now, we can test the new alias by simply typing aliases in the terminal. This
should display all the aliases defined in the .bashrc file.
Files and folders
Creating directories and navigating the file system
Now, let's create a new directory called projects in the home directory
with a subdirectory called linux. We can use the mkdir command to create
directories. The -p flag allows us to create parent directories as needed. Run
the following command: mkdir -p projects/linux.
We are moving into the linux directory with cd projects/linux. The cd command
is used to change directories. You can use cd .. to move up one directory level
or cd ~ to return to the home directory.

Creating files
Now, we are going to create a new file called notes.txt in the linux
directory. We can use the touch command to create an empty file. Run the
following command: touch notes.txt.

Writing to files
Let's write some notes to the notes.txt file. We can use the echo command
to write text to a file. Run the following command: echo "I am a Headline" >> notes.txt.
Verify the contents of the file with head notes.txt. Normally we use this to look at
the beginning of a file, but since our file is small, we can see everything.

Let's add some more text to the file. Run the following commands:
echo "This is my first note." >> notes.txt
echo "This is my second note." >> notes.txt
echo "What is the answer to life, the universe and everything?: PLACEHOLDER" >> notes.txt

Changing content in files
We added a capitalized word named PLACEHOLDER in the last line of our notes. We are going to
replace this word with the number 42 using sed, which stands for stream editor. Run the following command:
sed -i 's/PLACEHOLDER/42/g' notes.txt. The -i flag tells sed to edit the file in place. The s/PLACEHOLDER/42/g part is the substitution command, which
replaces all occurrences (/g means global) of PLACEHOLDER with 42.

This is useful for quick replacements in files without opening a text editor.
Deleting files
Be cautious when using the rm command, especially with the options -rf. The contents will be permanently deleted. If in doubt, use the -i flag instead, which prompts for confirmation before deleting each file.
If you want to delete a file, you can use the rm command. For example, to delete
the notes.txt file, you would run: rm notes.txt.
Deleting directories
To delete a directory and its contents, you can use the rm -r command. For
example, to delete the projects directory and all its contents, you would run: rm -r projects. Again, be cautious when using this command, as it will
permanently delete the directory and all its contents.
Conclusion
In this part of the series, we covered some useful Linux commands and how to work with files and folders. We also covered how to navigate the file system. There are many more commands and options available in Linux, so I encourage you to explore and learn more.
In Unix and Linux, everything is considered a file, including hardware devices and processes. This means that we have to be proficient in working with text and files to effectively manage and interact with the system. That is the reason why we focused on files and text manipulation in this part of the series.
What's next?
Coming up in the next part of the series, we will set up a simple web server using apache2. We will also look at how to manage services and processes in Linux.
Did you find this helpful, please support me on Ko-fi.com - jihillestad