Learning Linux - Part 1
Learning the basics of Linux by getting a shell up and running with Azure Virtual Machines and Terraform.
Introduction
Welcome to the first part of my journey into learning Linux in a DevOps context. In this series, I will document my experiences and the steps I take to learn how to use Linux effectively. This first part focuses on getting a Linux shell up and running using Azure Virtual Machines and Terraform.
I have some prior experience with Linux, but I am by no means an expert yet. My goal is to learn more about Linux, its command line interface, and how to manage Linux servers effectively. Linux proficiency is essential for modern DevOps practices.
Prerequisites
Before we begin, ensure you have the following prerequisites in place:
- An Azure Subscription and an account with sufficient permissions to create resources. Contributor role is sufficient for this lab. More granular roles are recommended in production.
- Terraform CLI installed on your local machine.
- Azure CLI installed on your local machine.
- Basic understanding of command line operations.
- Some prior knowledge in Terraform and Azure.
- A Storage Account in Azure for Terraform state management.
- Git installed on your local machine.
Preparing to get a pet
Before we dive into the technical details, let's set the stage for our Linux adventure. Think of this as preparing to get a pet. You need to choose the right breed (Linux distribution), set up a comfortable home (virtual machine), and ensure you have the necessary tools to care for it (Terraform and Azure).
Why a pet?
Just like getting a pet requires preparation and care, setting up a Linux environment requires planning and understanding. In this case, our "pet" is a Linux virtual machine that we get from the Pet Store: Azure Portal.
In the future, we'll move on to Cattle where we don't have to care for each individual server in the same degree.
Choosing the right breed
A good pet penguin for this journey is Ubuntu, a proven and popular Linux distribution. Ubuntu is known for its user-friendliness and extensive community support, making it an excellent choice for both professionals and beginners.
Setting up a comfortable home
To house our Linux pet, we will use Azure Virtual Machines. Azure provides a robust and scalable platform for running virtual machines, making it an ideal choice for our Linux environment.
Tools for care
To manage our Linux virtual machine, we will use Terraform, a popular IaC (Infrastructure as Code) tool. Terraform will set up and pre-configure necessary resources in Azure, allowing us to focus on learning Linux rather than the intricacies of cloud infrastructure.
Setting up the environment
Before we can create our Ubuntu Linux VM, we need to set up our environment. This includes building the Azure Infrastructure with Terraform.
The resources we will create
The following resources will be built in Azure with our Terraform Code:
Resource Group
|---Virtual Network
    |---Subnets
        |---Azure Bastion Subnet
        |---Default Subnet for our VM
            |---Network Security Group
    |---Public IP's
        |---Bastion Public IP
        |---VM Inet Access Public IP
    |---Virtual NIC for our VM
|---Azure Bastion
|---Azure Key Vault
    |---Public SSH Key
    |---Private SSH Key
|---Azure Log Analytics Workspace
|---Storage Account for logs
|---Network Watcher
    |---Virtual Network Network Watcher Flow Log
Step 1: Clone the repository
First, clone the repository that contains the Terraform configuration files for setting up the Azure infrastructure. My supporting repo is tagged with v0.1.3 for this part of the series.
git clone --branch v0.1.3 https://github.com/Jihillestad/tflab-linux-public.git- cd into the cloned directory:
cd ./tflab-linux-public git switch -c mainto make the git repo your own main branch.git remote remove originto remove the original repo as remote.
Step 2: Log in to Azure and prepare your Backend
-
Log in to your Azure account using the Azure CLI:
az login -
If you have an Azure Storage Account for Terraform state management, set the following environment variables:
export ARM_ACCESS_KEY="your_storage_account_key"export ARM_SUBSCRIPTION_ID="your_subscription_id"
-
Create a file named tflab-linux.tfbackend in the root of the cloned repository with the following content:
storage_account_name = "YOUR_TF_BACKEND_STORAGE_ACCOUNT_NAME"
container_name = "tfstate" # Or whatever
key="tflab-linux/terraform.tfstate"
Step 3: Configure Terraform Variables according to your taste
Example: terraform.tfvars
prefix       = "myorg"
project_name = "linuxlab"
environment  = "core"
env_version  = "0.0.1"
Step 4: Initialize Terraform
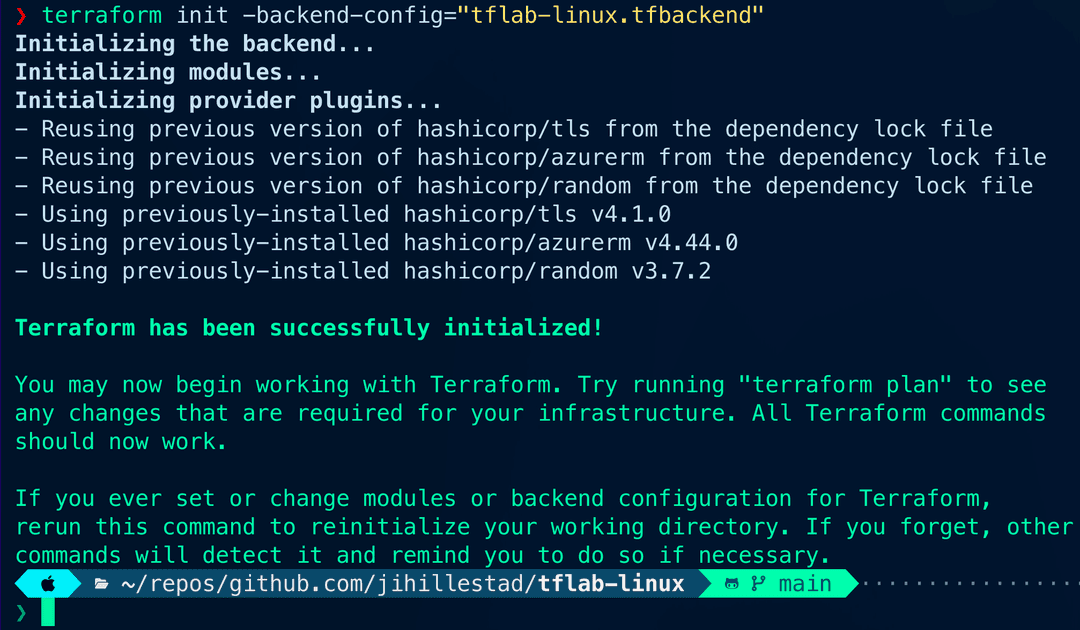
Initialize Terraform to set up the backend and download necessary providers:
terraform init -backend-config="tflab-linux.tfbackend"The initialization process will set up the backend and download the necessary providers.
Step 5: Review the Terraform plan
Review the Terraform plan to see what resources will be created:
terraform planThe Terraform plan will show you a detailed overview of the resources that will be created in Azure.

Step 6: Create the resources
Apply the Terraform configuration to create the resources in Azure:
terraform apply --auto-approveThe Terraform apply command will create the resources in Azure as defined in the configuration files. Make sure there are no errors during the process.

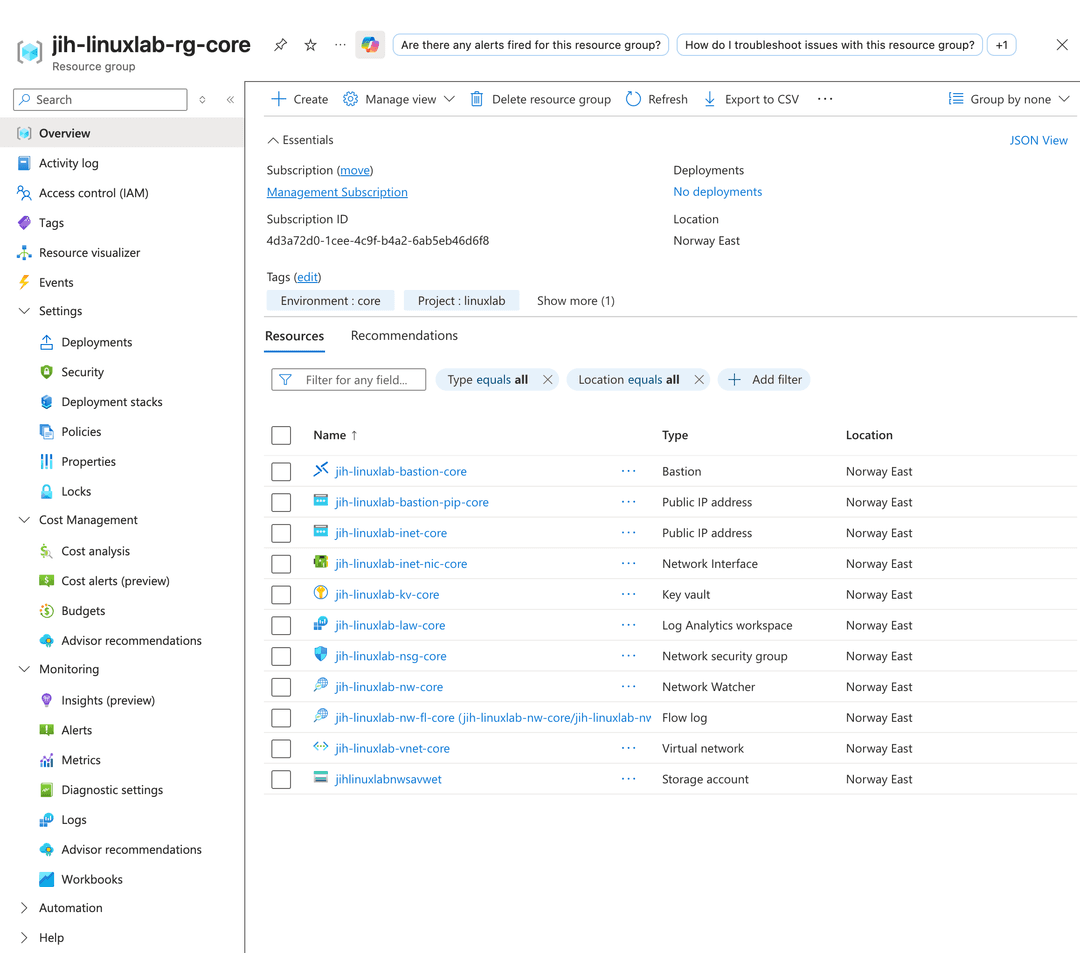
Step 7: Verify the resources
Once the Terraform apply is complete, verify that the resources have been created successfully in the Azure Portal. Look in Resource Groups for the new resource group created by Terraform and explore the resources within it:
Step 8: Create the Ubuntu Linux VM in Azure Portal
Now that we have our infrastructure set up, we can create the Ubuntu Linux VM using the Azure Portal. Follow these steps:
Creating Virtual Machines in Azure Portal does not allow us to use pre-created Virtual NICs or Public IPs. We will have to create a new Virtual NIC and Public IP during the VM creation process.
The SSH Public Key is stored as a secret in the Azure Key Vault created by Terraform. You can retrieve it using the Azure CLI or Azure Portal. Make sure to copy the Public Key value when creating the VM. They are not directly selectable in the VM creation wizard.
-
In Azure Portal, navigate to Virtual Machines and click on "Create" > "Virtual Machine".
-
Select your Resource Group created by Terraform, create a name for your VM, and choose the region where your resources are located. Use the same values as in the image below.

-
Under Administrator Account, select "SSH Public Key" as the Authentication type. Paste the SSH Public Key retrieved from the Azure Key Vault into the "SSH public key source" field. The image shows the rest of the values needed.

-
Go to the Disks tab and select "Standard SSD" for the OS disk type. Use the same values as in the image below.

-
Go to the Networking tab. Make sure to select the Virtual Network and Subnet created by Terraform. For the Public IP, select "Create new" and create a new Static Public IP for the VM. Keep the rest of the settings as default. Use the same values as in the image below.

-
Leave the Management, Advanced, and Tags tabs as default.
-
Go to the Monitoring tab. Enable "Boot diagnostics" and select "Enable with custom storage account". Select the Storage Account created by Terraform. Use the same values as in the image below.

-
Review the settings and click on "Create" to deploy the VM.
-
Verify the VM is running by navigating to the Virtual Machines section in the Azure Portal.
You should now see your newly created Ubuntu Linux VM in the list of virtual machines in your resource group.
Step 9: Connect to the Ubuntu Linux VM
Now that the VM is up and running, we can connect to it using SSH. For security reasons, we use Azure Bastion for our SSH connection. Follow these steps:
- In Azure Portal, navigate to the Virtual Machines section and select your newly created VM.
- Click on Bastion in the left-hand menu.
- Use SSH and select your SSH Private key from your Key Vault created by
Terraform.

- Click on "Connect" to open an SSH session to your VM.
Step 10: Welcome to your Ubuntu Linux VM
You should now be connected to your Ubuntu Linux VM via SSH. You can start exploring the Linux command line and learning more about Linux.

-
Verify internet connectivity by running:
ping -c 4 google.com
-
Update the package list and upgrade installed packages:
sudo apt update && sudo apt upgrade -y
Step 11: Clean up resources
Azure Resources generate costs as long as they are running. To avoid unnecessary costs, it's a good practice to clean up the resources once you are done with your Linux lab. Virtual Machines, Public IP's, and Storage Accounts are some of the resources that can incur costs.
When creating Network Watcher flow logs, Azure creates 2 resources automatically: a Data Collection Rule and a Data Collection Endpoint which are not managed by Terraform.
-
Delete the VM from the Azure Portal. Make sure to include the associated resources like the Public IP, OS Disk and Virtual NIC.
-
Delete the Data Collection Rule and Data Collection Endpoint created by Network Watcher in the Azure Portal.
-
Clean up the rest of the resources created by Terraform by running:
terraform destroy --auto-approve
Conclusion
In this first part of the series, we successfully set up an Ubuntu Linux Virtual Machine in Azure using Terraform. We also connected to the VM securely using SSH via Azure Bastion. This setup provides a solid foundation for learning Linux and exploring its capabilities.
We used a pet approach for our Ubuntu Linux VM to get familiar with how to set it up using Azure Portal. If kept running, an admin needs to care for it by fixing issues, updating it and manually reconfigure it when needed. The Azure resources used to support the VM were deployed using a cattle approach, where the infrastructure can be easily replaced when something goes wrong, they are no longer needed or changes are required.
What's next?
In the next part of the series, we will dive deeper into Linux, exploring its command line interface, file system, and basic administration tasks. Stay tuned for more adventures in the world of Linux!
Did you find this helpful, please support me on Ko-fi.com - jihillestad